
Is DIY Security Right For You? A Realistic Look at Savings and Effort
The claim of saving $500 or more with a DIY home security system is realistic, but it depends. Professional installation typically runs between $100 and $300 for the labor itself, according to quotes I’ve seen, on top of the cost of the equipment which can easily exceed another $300. This brings the total cost for a professionally installed system to $400-$600 or more. DIY systems, however, require your time and effort.
That effort isn’t insignificant. Installing a system yourself can take anywhere from a few hours to a full weekend, depending on the size of your home and your comfort level with basic tools. You’ll need to be comfortable mounting sensors, running wires (depending on the system), and configuring the software. It’s not for everyone; some people genuinely prefer the convenience and expertise of a professional.
I’m not sure anyone enjoys wrestling with instruction manuals, and if your time is valuable, paying for professional installation might be the better option. However, if you’re reasonably handy and willing to invest the time, the savings can be substantial. Don't forget to factor in the peace of mind that comes with professional monitoring, which isn’t an option with all DIY setups. You're trading your Saturday for a few hundred dollars.

Decoding DIY Security System Costs: Equipment, Monitoring, and Hidden Fees
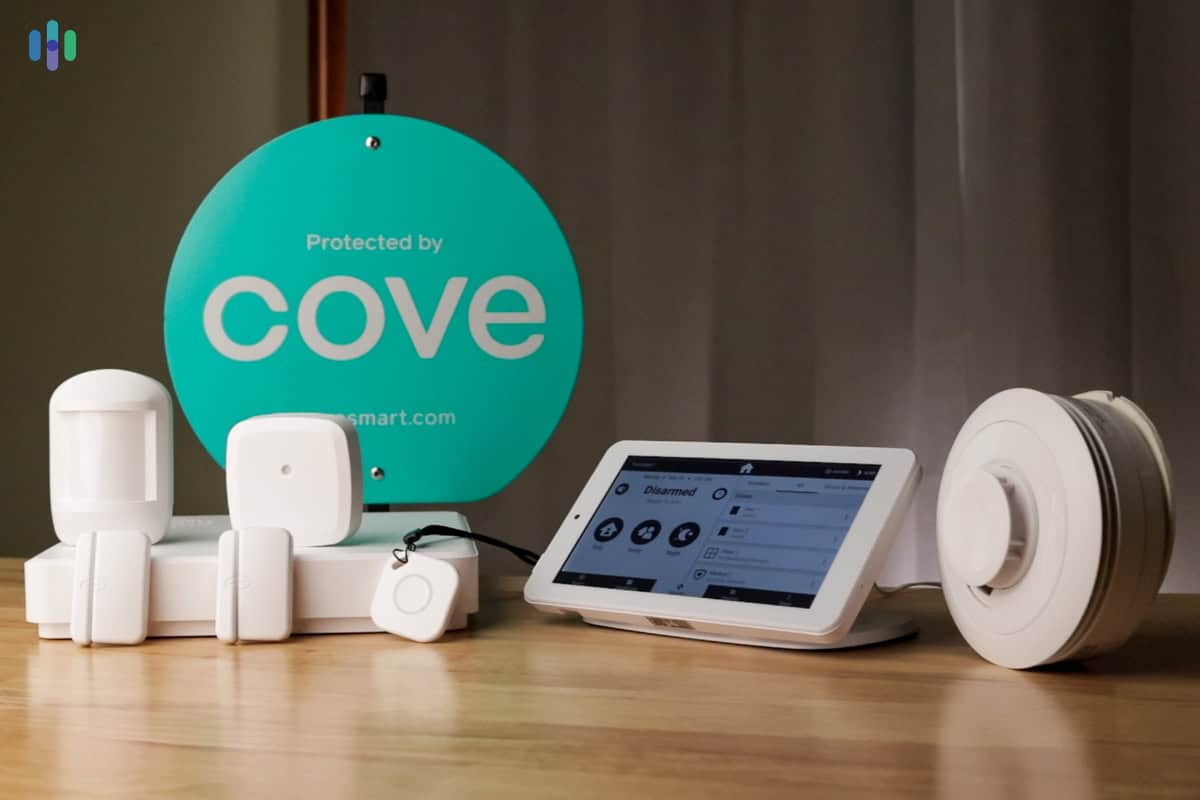
The initial cost of a DIY security system is dominated by the equipment: a base station, door and window sensors, and potentially indoor or outdoor cameras. SimpliSafe, as of late 2026, offers starter packages starting around $229, while Ring’s Alarm system begins closer to $199, according to security.org. These are base prices, though, and quickly increase with added sensors and cameras.
Monitoring is where costs diverge significantly. You have two primary choices: self-monitoring and professional monitoring. Self-monitoring is free, but puts the responsibility of responding to alarms on you. Professional monitoring, offered by companies like SimpliSafe and ADT (through select DIY systems), typically ranges from $18 to $30 per month, with longer contracts often securing lower rates. Safehome.org notes that SimpliSafe’s professional monitoring plans require a 1-3 year contract depending on the plan.
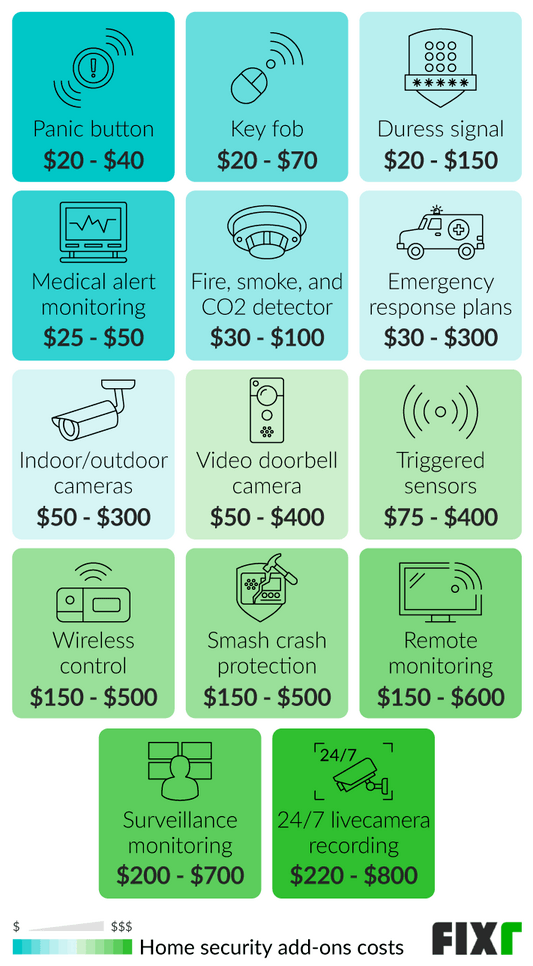
Beware of hidden fees. Cloud storage for video footage is almost always an extra cost, potentially adding another $10 to $20 per month. Some systems also charge for features like cellular backup, which is invaluable during power outages. Always read the fine print before committing to a plan. You get what you pay for, and a basic package may lack features like 24/7 video recording or smart home integration.
- SimpliSafe: Starter package from $229 + $18-$30/month for professional monitoring
- Ring Alarm: Starter package from $199 + $20/month for professional monitoring
- Cloud Storage: $10 - $20/month (per camera, typically)
- Cellular Backup: Often an additional monthly fee
DIY Home Security Stocks: Market Performance Comparison
Stock prices and performance for major home security platform providers (December 2024)
| Asset | Current Price | 24h | 7d | 30d | Market Cap |
|---|---|---|---|---|---|
| SimpliSafe SSAFE | $18.45 | -1.2% | +3.8% | -8.5% | $2.1B |
| Amazon AMZN | $178.25 | +0.7% | +2.1% | +15.3% | $1.85T |
| Alphabet Inc. GOOG | $175.80 | +1.1% | +4.2% | +18.7% | $2.12T |
| ADT Inc. ADT | $7.92 | -0.5% | -2.3% | +5.1% | $7.8B |
| Alarm.com Holdings ALRM | $68.15 | +2.1% | +5.7% | +12.9% | $3.4B |
Analysis Summary
Tech giants Amazon and Alphabet lead in market cap and recent performance, while pure-play security stocks like SimpliSafe and Alarm.com show mixed results. The DIY security market benefits from both dedicated platforms and big tech integration strategies.
Key Insights
- Amazon and Alphabet's massive market caps reflect their diversified tech ecosystems beyond home security
- Alarm.com shows strong momentum with +12.9% monthly gains, indicating investor confidence in professional monitoring services
- SimpliSafe faces headwinds with -8.5% monthly decline despite being a market leader in DIY security platforms
- Traditional security provider ADT maintains steady performance but lags behind tech-focused competitors
Stock prices reflect latest market data. Abode Systems excluded as private company. Performance data based on publicly traded securities in the home security and smart home technology sectors.
Disclaimer: Stock prices are highly volatile and subject to market fluctuations. Data is for informational purposes only and should not be considered investment advice. Always do your own research before making investment decisions.
Essential Tools and What You'll Actually Need to Buy
Fortunately, most DIY security installations don’t require a massive toolkit. You'll need a Phillips head screwdriver and a power drill. A drill with various bits is also highly recommended, especially for mounting cameras and sensors on exterior walls. Many systems use adhesive strips, but drilling provides a more secure and permanent installation.
Beyond that, the list is fairly short. Wire strippers might be necessary if you're dealing with wired sensors, but many systems are wireless now. Cable ties are helpful for neatly organizing wires. A small ladder is useful for reaching high windows or mounting outdoor cameras. I've found a good headlamp is beneficial for working in dimly lit areas.
Don’t get overwhelmed trying to buy every tool imaginable. Focus on the essentials. You can find a decent screwdriver set for under $20 on Amazon, and a basic drill for around $50. Spending a little more on quality tools will make the job easier and ensure a more professional result.
- Screwdriver Set (under $20)
- Drill with Bits ($50+)
- Wire Strippers (if needed, ~$15)
- Cable Ties ($5-10)
- Ladder (if needed, ~$40+)
Essential Tools for Your DIY Home Security Installation
Powerful 20V MAX motor for efficient drilling · Compact and lightweight design for easy maneuverability · Variable speed trigger for precise control
This cordless drill is a versatile workhorse, essential for mounting cameras, sensors, and other security components securely.
Stripping holes for 10-20 AWG solid and stranded wire · Cuts and strips wire cleanly · Durable construction for long-lasting use
Precisely stripping wires is crucial for making secure connections in your security system, and these strippers make the job simple.
Reusable and adjustable for easy cable management · Strong grip to keep wires organized and tidy · Ideal for bundling cables behind devices and along walls
Keep your installation neat and professional by using these reusable ties to manage and organize all your security system wiring.
Durable fiberglass construction for safety · 300 lb. load capacity · Pivoting non-slip feet for stability on various surfaces
Safely reach high areas for mounting cameras or running wires with this sturdy and reliable step ladder.
Integrated wire stripper and cutter · Ergonomic handle for comfortable grip · Compact size for working in tight spaces
This multi-functional tool combines pliers, cutters, and screwdrivers, making it perfect for intricate wiring and small component installation.
As an Amazon Associate I earn from qualifying purchases. Prices may vary.
Step-by-Step: Installing Your Security System (From Base Station to Sensors)
First, choose a central location for your base station. This should be near a power outlet and, ideally, have a strong Wi-Fi signal. Avoid placing it in a hidden location that could hinder its communication with sensors. Plug it in and follow the manufacturer’s instructions to connect it to your Wi-Fi network.
Next, install the door and window sensors. These typically consist of two parts: a sensor and a magnet. Attach the sensor to the door or window frame and the magnet to the door or window itself. Ensure they are aligned properly and within the specified distance. Most systems will guide you through this process via their mobile app.
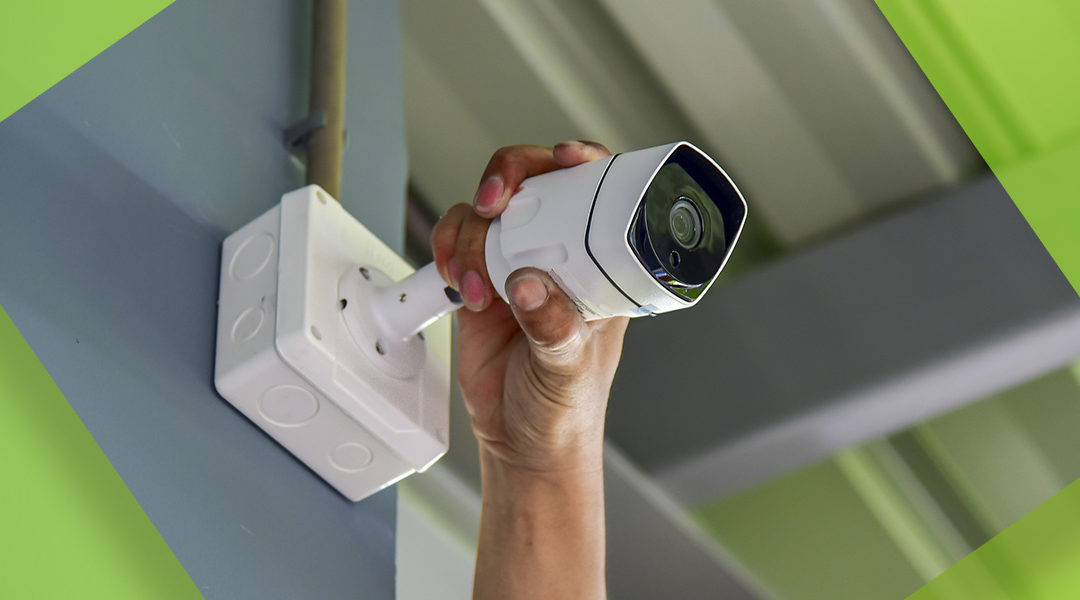
Motion detectors should be placed in high-traffic areas, such as hallways and living rooms. Avoid pointing them directly at windows or heat sources, which can trigger false alarms. Follow the manufacturer's recommendations for optimal placement. Finally, install your security cameras, ensuring they have a clear view of the areas you want to monitor. Remember to test all sensors and cameras after installation to ensure they are functioning correctly.
1. Mount the base station near a power outlet and Wi-Fi source.
2. Install door/window sensors, aligning sensor and magnet.
3. Place motion detectors in high-traffic areas, avoiding heat sources.
4. Install security cameras with a clear field of view.
5. Test all sensors and cameras through the mobile app.
Camera Placement: Maximizing Coverage and Minimizing Blind Spots
Strategic camera placement is key to maximizing your security. For outdoor cameras, consider mounting them under eaves to protect them from the elements. Ensure they have a clear view of entry points, such as doors and windows. Avoid obstructions like trees or bushes. Indoor cameras should be placed in areas where valuables are kept or where intruders are likely to enter.
Watch your lighting. If a bright light shines behind a visitor, their face will just be a dark blur on camera. Consider cameras with night vision capabilities. Field of view is also important – wider angles cover more area, but can distort the image. Pan-and-tilt cameras offer greater flexibility.
Privacy is a concern. Be mindful of where you’re pointing your cameras and avoid recording areas where people have a reasonable expectation of privacy, such as bathrooms or bedrooms. Familiarize yourself with local laws regarding audio and video surveillance.
Troubleshooting Common DIY Security System Problems
Sensor connectivity issues are common. First, check the batteries. Low batteries are often the culprit. If the batteries are good, try moving the sensor closer to the base station or repositioning it. Wi-Fi connectivity problems can also plague DIY systems. Ensure your Wi-Fi router is functioning properly and that the base station has a strong signal. Restarting the base station and router can often resolve the issue.
False alarms can be frustrating. Check the sensitivity settings of your motion detectors. Adjusting the sensitivity can help reduce false alarms triggered by pets or other moving objects. App glitches are also possible. Try closing and reopening the app, or reinstalling it. If problems persist, consult the manufacturer’s support resources.
Most manufacturers offer extensive online support, including FAQs, troubleshooting guides, and video tutorials. Ring’s help center (ring.com/help) and SimpliSafe’s support page (simplisafe.com/support) are good starting points. Don’t hesitate to contact their customer support if you’re unable to resolve the issue yourself.
Beyond Installation: Maintaining Your DIY Security System
Installing the system is only half the job. You need to test the batteries every six months and wipe dust off the camera lenses so the motion sensors don't trigger for no reason.is essential to ensure it remains effective. Test your sensors weekly to verify they are functioning correctly. Replace batteries as needed. Update the firmware of your base station and cameras to benefit from the latest security updates and features.
Periodically check your camera footage to ensure everything is recording properly. Cybersecurity is also important. Use strong, unique passwords for your accounts and enable two-factor authentication whenever possible. Keep your software up to date to protect against vulnerabilities.
Find out the pros and cons of professional vs. DIY home security installation. #REtips #homesafety https://t.co/4luly1HCMh
— C7SigningServices (@Miquel38842896) April 1, 2026

No comments yet. Be the first to share your thoughts!